A few weeks ago, I hosted a brunch for a few friends. It had been a while since we’d gotten to catch up and since our babies had a play date. Since dinner is tough for baby bedtimes and going out can be a challenge with fussing and naptime, brunch has become our new go-to to hang out with friends. It helps that it’s a super easy meal to prepare, as we usually mix store-bought items with homemade items.
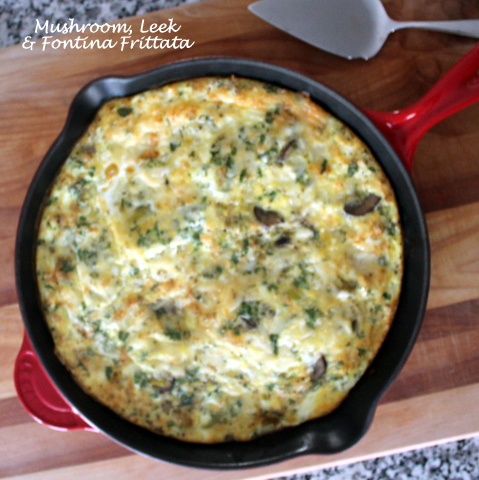
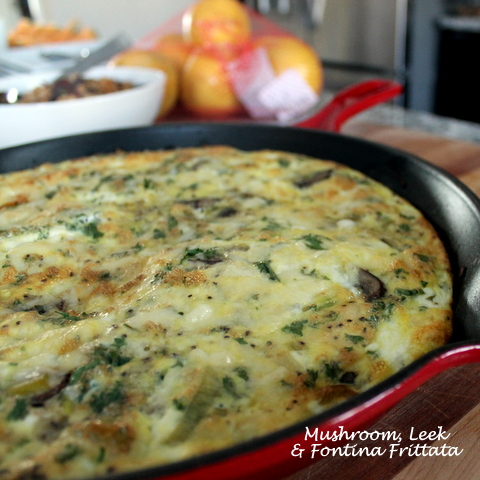
The overall meal was fairly light and healthy. Friends brought fresh fruit and muffins, although you can certainly make your own (these strawberry muffins are a favorite of mine). I made the granola a day ahead and the frittata took under 30 minutes to prepare and get into the oven. This is definitely a recipe I’ll be keeping in my back pocket for future brunches.
2-3 medium leeks, white and green parts only, chopped
8 oz. crimini mushrooms, thinly sliced
12 large eggs
1/2 c. sour cream (low-fat is fine)
2 Tbs. chopped fresh parsley
3/4 c. shredded Fontina cheese, divided
kosher salt
freshly ground black pepper
Preheat oven to 350°F.
While oven is preheating, heat 1 Tbs. olive oil in a 10-12 inch oven-proof skillet over medium heat. Add leeks and cook until softened, about 5 minutes. Add mushrooms and continue cooking until mushrooms are slightly browned and no liquid remains in the pan, about 10 minutes.
As mushrooms are cooking, whisk together eggs, sour cream and parsley. Stir in 1/2 c. of the cheese and season with salt and pepper.
Increase heat on stove to medium-high and add remaining 1 Tbs. olive oil. Add egg mixture and allow to cook without touching until edges are starting to set, about 5 minutes. Sprinkle remaining cheese on top of the frittata and transfer skillet to the preheated oven. Bake until cooked throughout and edges are golden brown, 25-30 minutes.
Remove from oven and serve hot or at room temperature.
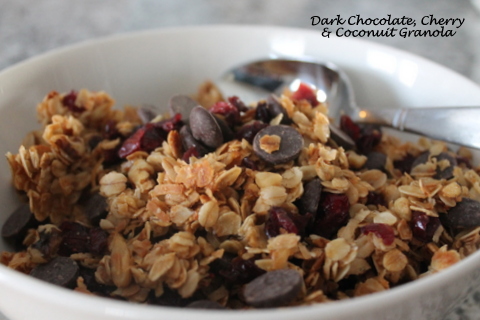
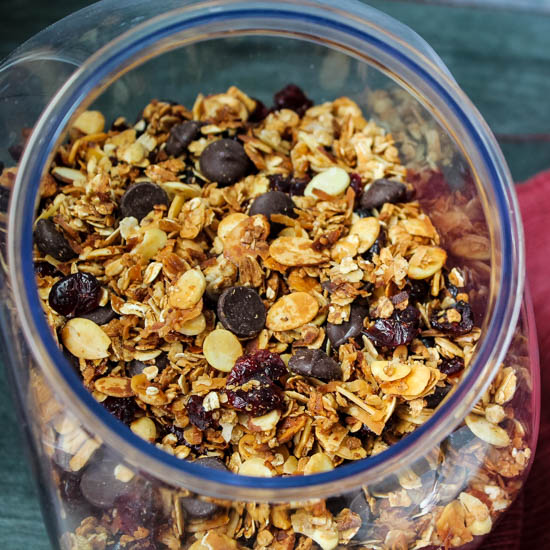
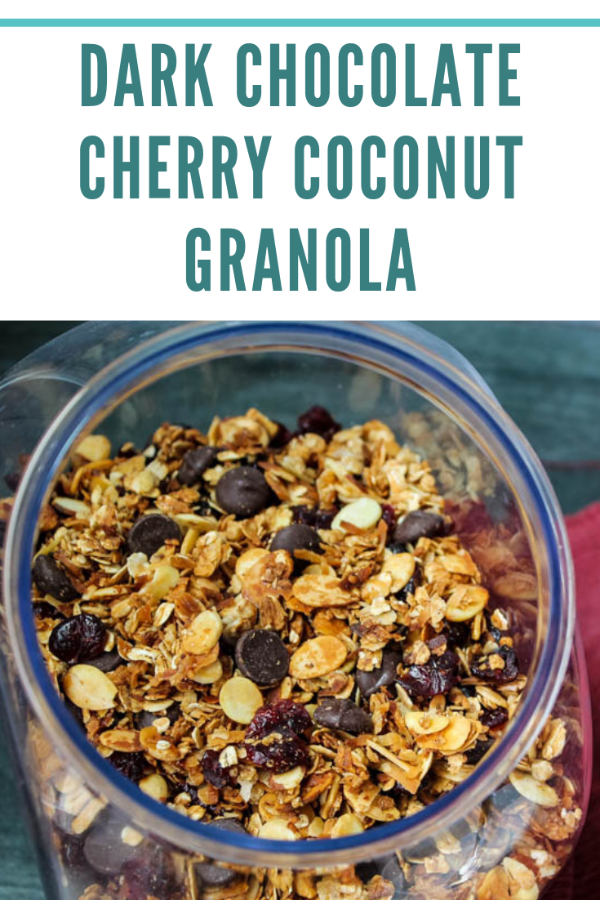
Rich dark chocolate, sweet coconut, and tart dried cherries make this homemade granola shine. Enjoy your indulgent homemade Dark Chocolate Cherry Coconut Granola as cereal, a yogurt topper, or a snack – you won’t be disappointed.
I’ve never been a big breakfast eater – bagels and bacon, I could do. Otherwise, it was a granola bar on the go, a couple of hours after I woke up. However, over the past several years, I’ve come to need a decent breakfast in the mornings. My criteria: quick and portable (because I pack it and eat it as I’m reading email at work), and full of staying power. I still love my bagels, but I need something with protein to keep me full until lunch time. One of my go-to breakfasts has become homemade granola and yogurt.
If I’m looking for quick, why, do you ask, would I use homemade granola? First, it is quick. In under 30 minutes, I can have a huge batch of granola that will last for a couple of weeks (because that’s how long it takes me to eat it – it will stay fresh longer!). But more importantly, store-bought granola doesn’t hold a candle to homemade granola. The homemade stuff is just sooooo much better. I love to make a batch and pack it with extras of my favorite ingredients – such as nuts and coconut. The homemade version is full of flavor and just slightly soft. After breakfast, hide the jar – handfuls might go missing at snack-time throughout the day!
Rich dark chocolate, sweet coconut, and tart dried cherries make this homemade granola shine. Enjoy your indulgent homemade Dark Chocolate Cherry Coconut Granola as cereal, a yogurt topper, or a snack - you won't be disappointed.
Course
Breakfast
Cuisine
American
Prep Time10minutes
Cook Time25minutes
Cooling Time30minutes
Servings7Cups
AuthorLiz
Ingredients
1c.shredded sweetened or unsweetened coconut
2/3c.coarsely chopped walnutsor almonds
3c.old fashioned rolled oats
2Tbs.veggie oil
1/2c.honey
1/4tsp.ground cinnamon
1/4tsp.kosher salt
1c.dried cherries
4-6oz.bittersweet chocolatechopped (or chips)
Instructions
Preheat oven to 325F and line a baking sheet with parchment paper.
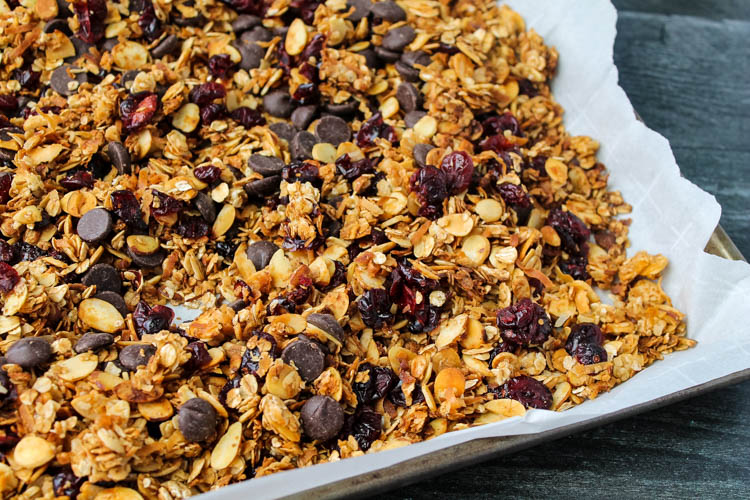
In a large bowl, toss coconut, nuts, oats, oil, honey, cinnamon and salt until well combined. Spread onto prepared baking sheet. Bake for 15 minutes, stirring every 5 minutes.
If your granola is golden and lightly toasted, remove from oven. If it's not (and mine wasn't), raise the temperature to 350F and cook for another 5-7 minutes, until golden.
Remove from oven. Sprinkle dried cherries on top and mix in. Spread granola back out, evenly, onto baking sheet. Press down gently, so that granola is in one big piece. Allow to cool to room temperature, about 30 minutes.
Break into pieces. Toss with chopped chocolate.
Store in an airtight container.
Recipe Notes
Dried cranberries may be substituted for dried cherries, if you're unable to find dried cherries.
This recipe was adapted from America’s Test Kitchen Healthy Family Cookbook via Annie’s Eats
For the first time in several years, I feel like we’ve had fall here in MD. Usually the weather goes straight from keep-your-ac-cranking hot to curl-up-in-front-of-the-fire cold. This year, we actually have had some beautiful fall weather. Sweatshirt weather. Apple picking weather.
While my apple picking buddy is away right now (and missed terribly!), I couldn’t let this year pass without a trip to the farm. My hubby and I took Sophie pumpkin picking for the first time. We had a picnic with some great friends. And I dragged my hubby to the apple orchard, to pick some of the tastiest apples of the year. Seriously. Apple picking apples taste sooo much better than store-bought apples.
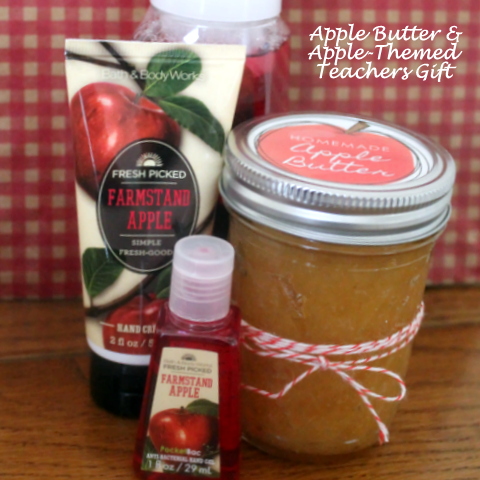
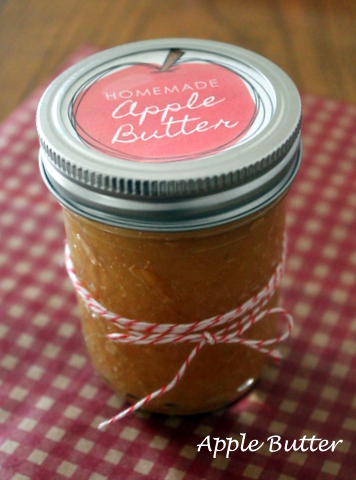
I had a lot of plans for those apples, beyond eating. I probably didn’t pick enough. I made Apple Berry and Rosemary Shortbread from Desserts for Breakfast (who takes amazing photos if you haven’t visited her blog). I made a ton of apple sauce for Sophie (she only likes homemade apple sauce, not store bought apple sauce). And finally, I tried my hand at canning for the first time – I made apple butter, my contribution this week for the 12 Weeks of Christmas Treats hosted by Meal Planning Magic. While the apple butter is a great contribution to a holiday breakfast table, I’m planning on giving my jars as Christmas gifts to teachers as part of an apple-themed basket along with some apple-scented items from Bath and Body Works.
Notes:
I used Red Delicious apples for this recipe. The original recipe calls for 2 lbs. MacIntosh apples and 2 lbs. Granny Smith apples. However, author Eleanor Topp says that you can use whatever is fresh and local. The different types might “change the texture of the butter slightly, but starting with quality fruit is the most important thing.”
The recipe refers to a “procedure for shorter processing time,” also from The Complete Book of Year-Round Small-Batch Preserving. Those directions are interspersed in the recipe below, so that you can time everything appropriately.
I did not use any special canning equipment. I used a large stockpot instead of a canner, and regular kitchen tongs instead of canning tongs. The only thing I bought were mason jars.
I found the labels for the jars at Money Saving Mom. Head over there to download your free printable labels.
Apple Butter
Adapted from The Complete Book of Year-Round Small-Batch Preserving via Epicurious
Makes 7 cups (4 – 8 oz. jars)
Ingredients:
4 lbs. apples, peeled, cored, and diced (~10-12 apples)
1 c. apple cider
2 c. granulated sugar
2 Tbs. lemon juice
Get the apple butter started: In a large saucepan over medium-high heat, combine apples and apple cider. Bring to a boil. Reduce heat and simmer for about 20 minutes, stirring occasionally, until mixture is reduced by half and apples have started to soften.
Meanwhile, fill a boiling-water canner (or a very large stockpot) with hot water. Bring to a boil. Using tongs, place canning jars in boiling water. Water should come about 2 inches over the jars. Boil for at least 10 minutes to sterilize. (This step took ~45 minutes for me.)
Continue with the apple butter: Stir in sugar and lemon juice. Increase heat again to medium-high and boil for another 20 minutes or so.
A few minutes before apples are ready, add lids to boiling water and sanitize according to manufacturer’s instructions.
Line a baking sheet with a couple of clean dish towels while you’re waiting.
Finish the Apple Butter & Can: Using an immersion mixer, puree apple butter to desired consistency. Remove jars and lids from canner/stockpot and place on lined baking sheet. Pour apple butter into sterilized jars, leaving 1/2-inch of room to the rim. If needed, remove air bubbles from jar by sliding a clean spatula between glass and food. Add additional apple butter if needed.
Wipe rim of jar to remove any excess food. Center lid on jar and screw on band until fingertip-tight. Return sealed jars to the canner, adding boiling water if needed to ensure that the jars are covered by 1-2 inches of water. Boil for 5 minutes.
Remove jars and return to lined baking sheet to cool to room temperature, at least 24 hours. Check jar seals – the lids should be turned downwards and should not move. Tighten band (mine came loose even though jar was sealed).
Label and store in a cool, dark place until giving away or enjoying.
I love sweets just as much as the next person, but I really didn’t want to post 12 weeks of desserts for the Twelve Weeks of Christmas Treats, hosted by Meal Planning Magic. I wanted to give you a couple of options that you could make during the holiday season, that while although a little sweet, don’t put you into a sugar coma.
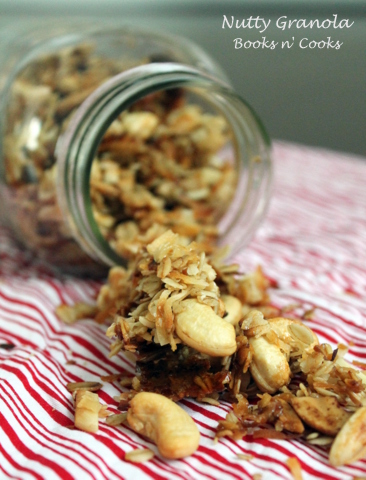
So for this week’s treat, you have nutty granola. Be careful, it’s addictive – I have some on my yogurt for breakfast and then continue to eat it by the handful all day long. This granola is super easy and quick to make and keeps well (at least 2 weeks) if you can keep it around the house. It’s a great make-ahead breakfast for overnight guests or, tie a pretty bow around it, and give it as a gift to a food-lover or host for your own travels this holiday season.
Nutty Granola
By Books n’ Cooks
Makes enough to fill 2 large mason jars (7-8 cups)
Ingredients:
1 c. roasted cashews, roughly chopped
2 c. old-fashioned oats
1 c. slivered almonds
1 c. sweetened coconut
4 Tbs. vegetable oil
3 Tbs. honey
Preheat oven to 350F. Line a large rimmed baking sheet with aluminum foil and set aside.
In a large bowl, combine all ingredients. Toss to ensure that the vegetable oil and honey coat the nuts, oats, and coconut.
Spread onto prepared baking sheet. Cook for 20 minutes, stirring every 5 minutes, until granola is golden brown. Remove from oven. Stir one more time before allowing to cool on the baking sheet.
This is my third week participating in the Twelve Weeks of Christmas Treats hosted by Meal Planning Magic. This week, I bring to you a sweet for those mornings when family stays over or an afternoon coffee with friends.
This crumb cake comes together easily and quickly. The cake is light and airy and the crumb topping is more than generous. It tastes as good as bakery crumb cake, if not better.
New York-Style Crumb Cake
Adapted from The Best of America’s Test Kitchen 2008/Cooks Illustrated
Servers 8-10
Makes an 8×8 in. pan
Ingredients for Crumb Topping:
8 Tbs. unsalted butter, melted and still warm
1/3 c. granulated sugar
1/3 c. brown sugar, packed
3/4 tsp. ground cinnamon
1/8 tsp. salt
1 3/4 c. cake flour
Ingredients for Cake:
cooking spray/vegetable oil
1 1/4 c. cake flour
1/2 c. granulated sugar
1/4 tsp. baking soda
1/4 tsp. salt
6 Tbs. unsalted butter, cut into 6 pieces, softened but still cool
1/3 c. buttermilk or plain low-fat yogurt
1 large egg plus 1 large egg yolk, at room temperature
1 tsp. vanilla extract
Make the Crumb Topping: Whisk together melted butter, sugars, cinnamon, and salt. When combined, add cake flour. Stir with a wooden spoon until mixture is thick and cohesive. Set aside and allow to come to room temperature while you prepare the cake.
Make the Cake: Preheat oven to 325F. Line an 8×8 inch pan with aluminum foil, with an inch or two overhanging edges of pan. Spray with vegetable oil/cooking spray and set aside.
In the bowl of a stand mixer, whisk (or beat on “stir”) flour, sugar, baking soda, and salt. With a mixer on medium-low speed, add butter, one piece at a time, until mixture is crumbly and butter is pea-sized. Increase speed to medium-high and add buttermilk, egg, egg yolk, and vanilla extract. Beat until light and fluffy, about 1 minute. The batter will be thick and very sticky.
Pour cake batter into prepared pan. Use an offset spatula to even it out, making sure the batter reaches all four corners and edges of the pan. Using your fingers to crumble the cinnamon-sugar-flour mixture into pea-sized pieces evenly over cake batter.
Bake for 35-45 minutes, until cake is browned and a toothpick inserted into the center comes out clean.
Allow to cool for 30 minutes in pan before using aluminum foil to remove cake from pan, move to a wire rack to cool completely. If desired, dust with confectioners’ sugar before serving.
Storage: May be tightly wrapped in plastic wrap and kept at room temperature for up to 2 days.