Strawberry Jam

Being a working mom, I always wish that I had more time with my kids – time to go out and do things. You know, trips to the parks, local museums, children’s events… that sort of thing. With our current routines, I feel like there’s just not enough time to do all of that, with working 5 days a week, finding time to do laundry, clean the house, grocery shop, and still manage to find some time to see friends and decompress a bit. But the one thing I think my hubby and I have been pretty good at is taking our kids out to the local farms to pick fruit during the summer and apples and the obligatory Halloween pumpkins during the fall.

The past couple of years, I’ve been lucky enough that my parents were in town for strawberry picking. The first year we went, we set off with the intention of picking some berries and maybe making a batch of the jam that my mom used to make when I was growing up. We accidentally ended up with close to 20 pounds of strawberries. Needless to say that day was filled with 3 times as much jam-making as anticipated (in addition to setting aside berries for freezing and eating) and a number of trips to the store to pick up extra supplies.

Since then, we’ve prepared a bit better. We still pick roughly 20 pounds of strawberries, but with the intention of canning more (my brothers and uncles have been over the moon with gifts of homemade jam). My son and daughter have a blast picking and eating the fresh berries, and my daughter can’t wait to get into the kitchen with Mommy and Manna (aka Grandma) to make some jam. It’s a family tradition that makes everyone happy.

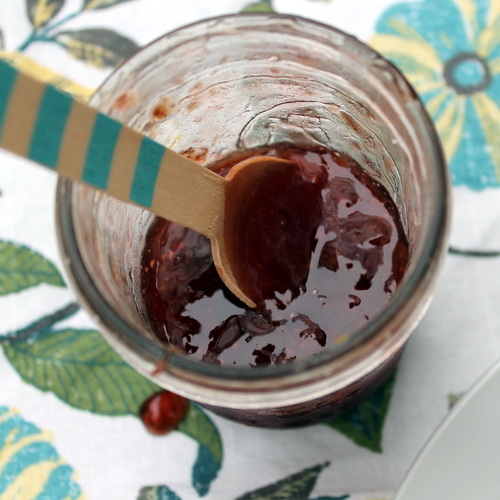
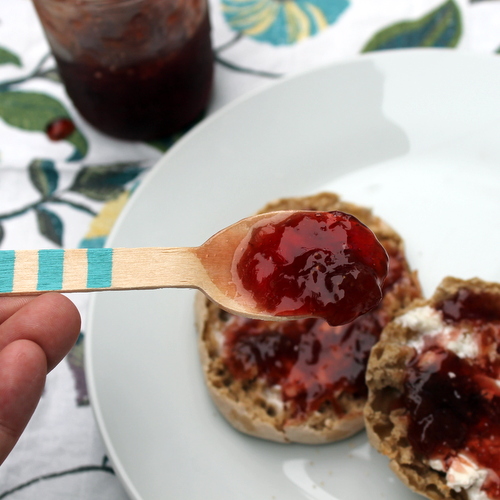
This jam can be made as chunky or smooth as you’d like, depending on how much you crush the strawberries. And I’ll give you my little secret – It’s on the sweeter side, and makes a wonderful topping for vanilla ice cream as well.

Cooking Note: I’ve made jam this two years in a row now, both times with my parents. I highly recommend taking advantage of the prep steps noted below, as the jam cooks up pretty quickly. If you have a second set of hands around to help with setting the timers and getting the jars ready for you, use them!

Strawberry Jam

Adapted from Certo

Makes 8-10 Cups

Materials:

  • Canning jars, with lids and bands
  • Very hot water (i.e. heat on a stove until very hot or boiling)
  • Wax, for sealing the jam
  • A small inexpensive pot with a lip, for melting the wax (I recommend one designated solely for this purpose)
  • Tongs, to move hot jars
  • A large (8+ quart) stainless steel stockpot, for making the jam (Don’t got smaller – the mixture will bubble up a good bit)
  • A stainless steel ladle, for portioning out the hot jam
  • A wide-mouthed funnel, for portioning out the hot jam
  • A baking sheet, lined with aluminum foil
  • Kitchen timer

Ingredients:

  • 5 c. barely crushed strawberries (from ~8 c. whole strawberries, hulled)*
  • 7 c. granulated sugar (I used Dixie Crystals sugar)
  • 1/2 tsp. unsalted butter
  • 1 packet Certo pectin

* Strawberries were barely crushed – smashed once or twice with a potato masher so that most were not whole. Don’t worry if it looks too chunky – the strawberries will break down more as they cook.

Prep: Wash jars and clean out sink. Place clean jars in the sink.

Fill a medium stockpot (~10+ cups) with water and start heating on stove. This water will be used to heat up canning jars.

Start melting wax in a small pot on another burner. When wax is completed melted, keep warm on lowest setting.

Place foil-lined baking sheet on the counter next to the stove (or wherever you’re going to be filling the jars). Set kitchen timer nearby.

Make the Jam: In a large (8+ quart) stainless steel stockpot over high heat, combine crushed strawberries, sugar, and unsalted butter, stirring constantly until sugar is melted. Bring to a rolling boil, 8-10 minutes.

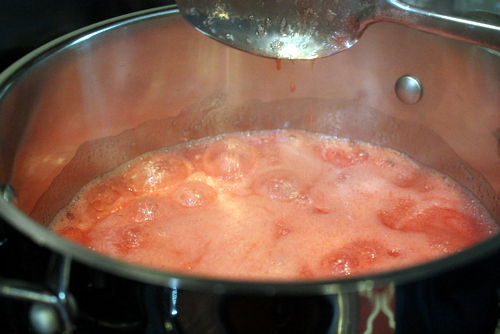
When mixture is very close to a boil, take hot water and fill waiting canning jars. The goal is to keep the jars very hot, so refill as needed, if the water cools before the jam is ready.

Stir to make sure the mixture is fully at a boil. Boil for 1 minute (time it!). Stir in Certo. Return to a rolling boil (happens very quickly, within a minute) and continue boiling for another minute. Turn off stove.

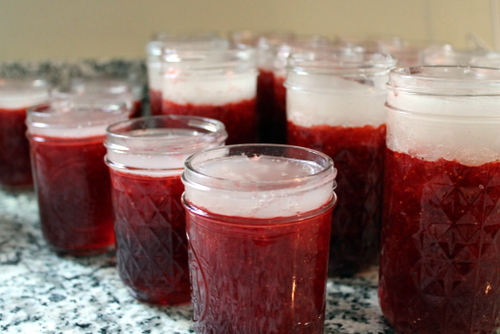
Can: Working quickly, empty water from canning jars and move jars onto waiting baking sheet. Using the funnel and ladle, quickly fill jars with jam, leaving about an inch of room at the top of the jars. Top off with about a 1/2 inch of melted wax. Let jars rest, allowing the jam to thicken and cool, and the wax to harden and seal in the jam.

If jars don’t completely seal (wax moves around or jam starts to come up above the wax), remove wax and store in the fridge for immediate use.

Store sealed jars in a cool place.

Serving: When read to open a jar, use a fork or knife to puncture the wax and remove from jar. The wax may be cleaned and set aside to be remelted for future canning.

Save

Save

Save

Save

Homemade Stew Seasoning

This feels a bit like a cheater post – a list of ingredients with one line of directions. But I couldn’t fit it nicely into my stew post (coming Sunday), so you get two. It makes up a little for my light posting schedule this month, right?

Anyway, homemade stew seasoning takes just minutes to whip up and I’m willing to bet that you have everything in your pantry already. But more than being quick, homemade seasoning means that you know exactly what’s in it – no preservatives or ingredients you can’t pronounce. Don’t make stew much? Simply halve the recipe for an even smaller quantity.

Homemade Stew Seasoning

Adapted from Epicurius and Rachel Cooks

Ingredients:

  • 1/2 c. all-purpose flour
  • 1 tsp. oregano
  • 1/2 Tbs. basil
  • 1/2 Tbs. parsley
  • 1/2 Tbs. kosher salt
  • 1 Tbs. freshly ground black pepper
  • 1 Tbs. paprika
  • 1/4 tsp. cayenne
  • 1/2 Tbs. celery seed
  • 1 Tbs. onion powder
  • 1 Tbs. garlic powder

Combine all ingredients in a small bowl and mix well.

Use 2-3 Tbs. mix per pound of meat used.

Yield: This recipe makes enough for 2-3 batches of stew, when 2 lbs. meat are used per batch.

Save

Blackberry Chia Seed Jam for #SundaySupper

Blackberry Chia Seed Jam

Ever since starting my own family, I’ve enjoyed going fruit picking. Don’t get me wrong, I’ve always enjoyed it. But there’s something special about watching your child eat fruit off of the bush or tree, and sometimes, become a complete and adorable mess in the process of eating the fruit.

I’m pretty new to preserving but it’s something I been enjoying as much as going fruit picking. Plus, it became a necessity when we picked such great quantities, particularly of berries, that we couldn’t eat them all before they went bad. If only berries lasted as long as apples… <sigh>

Anyway, with an abundance of fresh fruit and vegetables in gardens, farms, and markets, the Sunday Supper Community is sharing their favorite recipes for preserving (freezing, canning, pickling, etc.) summer produce. With that in mind, this week I’m sharing a blackberry jam recipe that we enjoyed (chosen because unlike most jams, it had the minimal about of sweetener in it).

Be sure to check out the other Sunday Supper recipes for preserving your produce after the recipe.

Blackberry Chia Seed Jam

 Adapted from Two Peas and Their Pod

Makes about 2 cups

Ingredients:

  • 1 lb. fresh blackberries
  • 2-3 Tbs. agave
  • 2 Tbs. chia seeds
  • 1/2 tsp. vanilla extract

In a medium saucepan, bring blackberries to a boil, stirring frequently. Lower heat and allow berries to simmer for 5 minutes, or until soften. Lightly mash berries to desired consistency.

Stir in agave and chia seeds. Continue to cook, stirring occasionally, until mixture thickens.

Remove from heat and stir in vanilla.

If using immediately: Allow jam to cool before pouring into a clean, airtight jar. Store in the fridge for up to two weeks.

To Preserve: Pour into a clean, airtight container and freeze.

EDIT: Preservation via canning has been removed from this post, as it has been suggested that canning chia seeds is not safe.

More Recipes to Preserve Your Summer Harvest

Canning

Dehydrating

Fermentation

Apple Butter

Apple Butter

For the first time in several years, I feel like we’ve had fall here in MD. Usually the weather goes straight from keep-your-ac-cranking hot to curl-up-in-front-of-the-fire cold. This year, we actually have had some beautiful fall weather. Sweatshirt weather. Apple picking weather.

While my apple picking buddy is away right now (and missed terribly!), I couldn’t let this year pass without a trip to the farm. My hubby and I took Sophie pumpkin picking for the first time. We had a picnic with some great friends. And I dragged my hubby to the apple orchard, to pick some of the tastiest apples of the year. Seriously. Apple picking apples taste sooo much better than store-bought apples.

I had a lot of plans for those apples, beyond eating. I probably didn’t pick enough. I made Apple Berry and Rosemary Shortbread from Desserts for Breakfast (who takes amazing photos if you haven’t visited her blog). I made a ton of apple sauce for Sophie (she only likes homemade apple sauce, not store bought apple sauce). And finally, I tried my hand at canning for the first time – I made apple butter, my contribution this week for the 12 Weeks of Christmas Treats hosted by Meal Planning Magic. While the apple butter is a great contribution to a holiday breakfast table, I’m planning on giving my jars as Christmas gifts to teachers as part of an apple-themed basket along with some apple-scented items from Bath and Body Works.

Notes:

  1. I used Red Delicious apples for this recipe. The original recipe calls for 2 lbs. MacIntosh apples and 2 lbs. Granny Smith apples. However, author Eleanor Topp says that you can use whatever is fresh and local. The different types might “change the texture of the butter slightly, but starting with quality fruit is the most important thing.”
  2. The recipe refers to a “procedure for shorter processing time,” also from The Complete Book of Year-Round Small-Batch Preserving. Those directions are interspersed in the recipe below, so that you can time everything appropriately.
  3. I did not use any special canning equipment. I used a large stockpot instead of a canner, and regular kitchen tongs instead of canning tongs. The only thing I bought were mason jars.
  4. I found the labels for the jars at Money Saving Mom. Head over there to download your free printable labels.

Apple Butter

Adapted from The Complete Book of Year-Round Small-Batch Preserving via Epicurious

Makes 7 cups (4 – 8 oz. jars)

Ingredients:Apple Butter

  • 4 lbs. apples, peeled, cored, and diced (~10-12 apples)
  • 1 c. apple cider
  • 2 c. granulated sugar
  • 2 Tbs. lemon juice

Get the apple butter started: In a large saucepan over medium-high heat, combine apples and apple cider. Bring to a boil. Reduce heat and simmer for about 20 minutes, stirring occasionally, until mixture is reduced by half and apples have started to soften.

Meanwhile, fill a boiling-water canner (or a very large stockpot) with hot water. Bring to a boil. Using tongs, place canning jars in boiling water. Water should come about 2 inches over the jars. Boil for at least 10 minutes to sterilize. (This step took ~45 minutes for me.)

Continue with the apple butter: Stir in sugar and lemon juice. Increase heat again to medium-high and boil for another 20 minutes or so.

A few minutes before apples are ready, add lids to boiling water and sanitize according to manufacturer’s instructions.

Line a baking sheet with a couple of clean dish towels while you’re waiting.

Finish the Apple Butter & Can: Using an immersion mixer, puree apple butter to desired consistency. Remove jars and lids from canner/stockpot and place on lined baking sheet. Pour apple butter into sterilized jars, leaving 1/2-inch of room to the rim. If needed, remove air bubbles from jar by sliding a clean spatula between glass and food. Add additional apple butter if needed.

2013_12.Weeks.Of.Christmas.Treats

Wipe rim of jar to remove any excess food. Center lid on jar and screw on band until fingertip-tight. Return sealed jars to the canner, adding boiling water if needed to ensure that the jars are covered by 1-2 inches of water. Boil for 5 minutes.

Remove jars and return to lined baking sheet to cool to room temperature, at least 24 hours. Check jar seals – the lids should be turned downwards and should not move. Tighten band (mine came loose even though jar was sealed).

Label and store in a cool, dark place until giving away or enjoying.


Homemade Cake Batter Mix & Cake Batter Cookies (Take 2)

When I was young, my mom used to take my brothers and I to Ben and Jerry’s for ice cream. I always got Chunky Monkey – vanilla ice cream with peanut-butter filled pretzels and chocolate swirls. Today, I only find Ben and Jerry’s in the freezer section of my local grocery store. I don’t know the last time I actually saw an ice cream shop.

Cake Batter Mix & BarkIt took moving after college for me to find another ice cream place that I loved just as much – Coldstone. Like when I was a kid, I find a flavor I like and don’t vary. At Coldstone, it’s cake batter ice cream (with crunched up graham crackers mixed in). Oooo, so good.

I’m not sure if it was because Coldstone made cake batter-flavored things popular or not, but since I met that ice cream flavor, I’ve been a sucker for cake batter-flavored things. I have tried cake batter bark (pictured at left), but was sorely disappointed – I found that the flavor of the white chocolate overpowered the cake batter flavor, no matter how much extra cake mix I added. But my chocolate cake batter toffee cookies were a winner as were the yellow cake batter and sprinkles variation below.

I don’t usually keep cake mix in the house, so when experimenting with the latest cookie recipe as well as the bark, I gave homemade cake mix a try. The recipe below reflects a half batch of the original recipe, as I didn’t have any need for a full 5 cups, no matter how long it can be kept.

Homemade Yellow Cake Batter Mix

Adapted Pennies on a Platter via BrownEyedBaker

Makes 2 1/2 c. yellow cake mix

Ingredients:

  • 1 c. granulated sugar
  • 3/4 c. all-purpose flour
  • 3/4 c. cake flour
  • 1/4 c. nonfat dry milk powder
  • 1/2 Tbs. baking powder
  • 1/2 tsp. table salt
  • 1/2 c. (1 stick) unsalted butter, cold and cut into 1/2-inch cubes
  • 1/2 Tbs. vanilla extract

In a food processor, pulse all ingredients except the butter and vanilla until just combined, about 15 seconds. With the mixer running, add butter cubes and vanilla until the mixture is fine and crumbly.

Store in an airtight container in the freezer for up to 2 months

Note: I have only used this in recipes that call for cake mix. If you’d like to make an actual cake with it, please see Mel’s Kitchen Cafe for instructions.

Cake Batter Cookies, Take 2

Adapted from this recipe

Makes 1 dozen cookies

Using the above cake mix, these cookies spread even more than the original recipe. However, they’re still super soft with just a slight crunch around the edges.

Ingredients:Cake Batter Cookies Take 2

  • 9 oz. homemade yellow cake mix
  • 1/2 tsp. baking powder
  • 1 large egg
  • 1/4 c. vegetable oil
  • 2 Tbs. sprinkles (optional)

Preheat oven to 350F and line two baking sheets with parchment paper. Set aside.

Whisk together cake mix and baking powder. Stir in egg and veggie oil. When combined, stir in sprinkles. Mixture will be fairly thick.

Using an ice cream scoop, portion onto prepared baking sheets, 6 cookies to a sheet spaced evenly apart. The cookies spread a lot while they bake.

Bake for 9-11 minutes, until edges are golden and center is cooked. Remove from oven and allow to cool on a baking sheet for a few minutes before moving to a wire rack to cool completely.