Today, I’m guest posting over at The Way To His Heart. Head on over and check out this recipe for Bacon Corn Bread – the perfect accompaniment to a big bowl of chili.

Recipes and Books
Today, I’m guest posting over at The Way To His Heart. Head on over and check out this recipe for Bacon Corn Bread – the perfect accompaniment to a big bowl of chili.
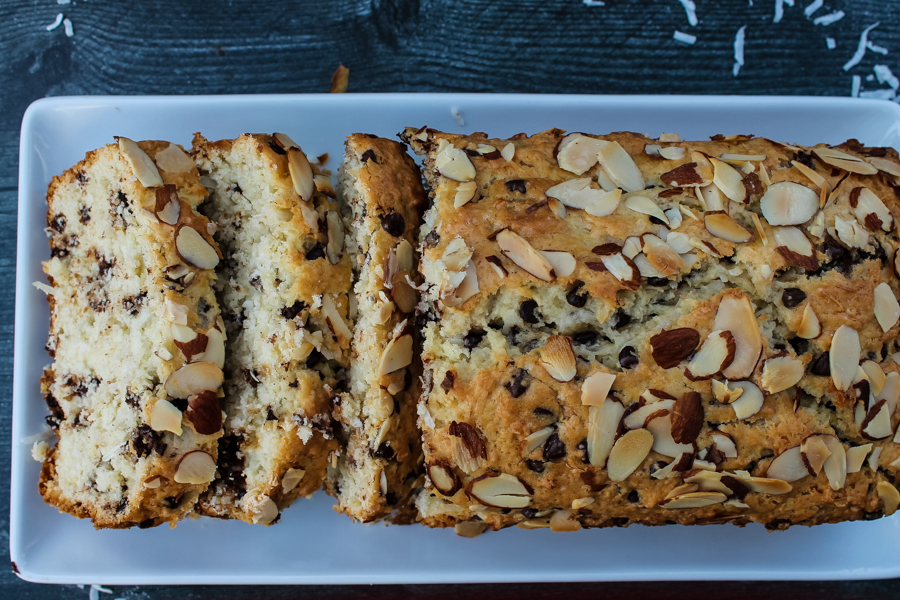
This Chocolate Coconut Almond Bread, a quick bread, is wonderful for snacking or gifting (think holidays, housewarming, or a hostess gift). The almond bread is sprinkled with sweet coconut and studded with semi-sweet chocolate chips – a sweet breakfast or afternoon snack.
 The list of cookbooks on my wish list is always pretty long. I try to be selective, but I inevitably end up with more on my list than I expect. Like, cookbooks make up most of my wish list.
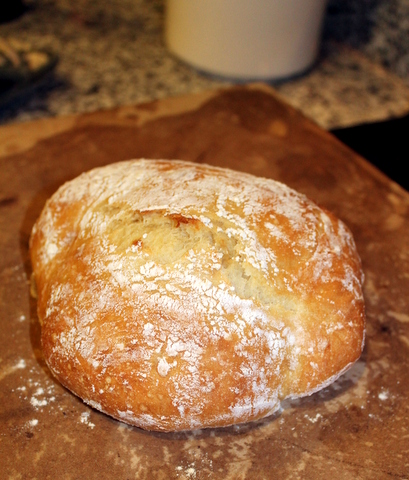
This past Christmas, I received Artisan Bread in Five Minutes a Day by Jeff Hertzberg and Zoe Francois. I had seen recipes from the book on various blogs and was intrigued by the concept – fresh bread with only 5 minutes of active time per day. After unwinding from holiday travel, one of the first things I did was whip out the book to give this ciabatta recipe a shot (to accompany weeknight bolognese for New Years Eve, with leftovers toasted to accompany a brunch of herb baked eggs). We were not disappointed. Since then, I’ve made several batches of the bread (as well as the bagels) in the book. Artisan Bread has rapidly become one of my most used cookbooks.
I was a little daunted when I opened the book and started reading the intro and notes, but the bread was actually super easy to make. Here’s the highlights:
1. Prep the starter. Refrigerate starter until needed, up to 2 weeks. The bread will slightly change flavor the longer it sits in the fridge.
2. Baking day: shape and allow to sit at room temp while the oven heats up. Bake and enjoy.
Prep Note: If you make a full batch and use a stand mixer, you’ll want to use a 7-quart mixer. If you don’t have one and want to make a full batch, mix by hand with a wooden spoon. (If you make half a batch, a 4.5-quart mixer will work fine.)
Ciabatta Bread
Adapted from Artisan Bread in Five Minutes a Day (p. 26 and 37)
Makes 4 1-lb. loaves (each loaf serving 4-6)
Ingredients:
*If water is cooler than 100F, dough will still rise, but probably in 3-4 hours, rather than the 2 hours stated below.
** The book notes that you can use whatever yeasty is available – the directions below won’t be impacted if you’re using instant, regular, or granulated yeast, although you may need to double the quantity of yeast if using cake yeast. This is because the longer storage time equalizes the yeast.
Equipment:
Make the Starter: In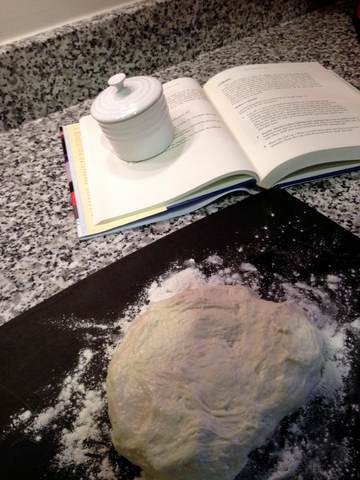 a 5-quart Tupperware container, combine warm water (about 100F), yeast, and salt. Yeast and salt do not need to be dissolved – just give it a quick stir.
Pour flour into a 7-quart stand mixer fitted with the hook attachment. Pour water mixture into center and mix on low speed (speed 2) until all flour has been incorporated into the dough. Dough with be wet and sticky.
Place dough back into Tupperware used to mix water/yeast/salt. Cover with a lid that is not airtight. (I used a traditional Tupperware, covered loosely with plastic wrap. I sealed 3 of the 4 corners, leaving one corner popped open). Allow to rise at room temperature for at least 2 hours, until top begins to flatten. Dough may take as long as 5 hours to rise, if the water was cooler than 100F 0r if the room is on the cooler side.
At this point, you can either refrigerate the dough as is, use it all, or use a portion and refrigerate the rest. Dough will keep in the fridge for up to 2 weeks. Just be aware that as the dough rests, the flavor develops and changes slightly. (I have only used refrigerated dough, which is a little less sticky than the fresh dough.)
Bread Baking Day!
This bread takes ~45 minutes to make the day of, including rest and baking time. The below timeline is I used to make fresh bread for dinner.
Ingredients:
1 hour before dinner: Set one rack in the middle of the oven and another in the lower half. Preheat oven to 450F. Place baking stone on a rack in the middle of the oven and an empty broiler pan on a lower rack.
Remove dough from fridge and cut off a 1-lb. piece of dough (1/4 of the dough if using the full recipe above) for every loaf of bread you’re making. Using wet hands to keep from sticking, place on a clean, unfloured surface. Shape dough into a ball by stretching the surface of the dough around to the bottom on all four sides. Flatten ball into a circle or oval, about 3/4 inch thick. (Thinner is ok, but thicker will result in a puffier bread.)
Lightly flour a pizza peel or cutting board. Place dough on board, lightly flour top, and allow to rest for 20 minutes.
30 minutes before dinner or whenever your 20-minutes rest is up: Slide dough from pizza peel/cutting board directly onto hot baking stone. Pour hot water into broiler tray and close oven door.
Bake for 20 minutes, until golden brown. Allow to cool on a rack before cutting or eating. I cooled the bread directly on baking stone – after 20 minutes, bread was still quite hot, but we ate it anyway. It was wonderful. 🙂
Serve warm or at room temperature. Need some inspiration? Try it with chicken scaloppini saltimbocca, beef bourguignon, or as an appetizer with spinach and artichoke dip.

It’s rare that I read a recipe and want to make it immediately. Usually it goes on my list, perhaps getting fit into the meal plan over the next month. This bread instantly appealed to me. I read it one evening and planned to make it the next morning. I pictured enjoying a slice with a cup of coffee or tea for breakfast, tempting my mom (who would be in town visiting) with a slice, telling her that it is way better than her lemon poppy seed bread. The best part was that there were ingredients that I always have in the house.
Most of the time. Not yesterday morning. I had apparently forgotten to restock both my almond extract and poppy seeds. So instead of enjoying my bread for breakfast, I ran out to the grocery store where I spend about an hour (because it’s always crowded and they never have enough cashiers working), came home to bake the bread, and enjoyed a slice with an afternoon cup of coffee.
This bread makes me wish I had afternoon tea more regularly or that we had coffee after dinner because it’s the perfect accompaniment. I loved the light, slightly sweet flavor of the bread. I have a feeling that I will be regularly stocking my freezer with these muffins.
Adapted from The Gingered Whisk
Makes 2 loaves bread or 24 muffins

 The weather has been pretty wonky lately – 60°F one day and flurrying the next day. One lazy weekend, one where it was bitter cold and flurrying, I hosted my best friend and her boyfriend for dinner. I had all day to play in the kitchen, with no other obligations or chores for the weekend (a rare occurrence!). I put together the below menu, which brought coziness into a frigid day. Nothing about this menu is particularly difficult to prepare, although it is a bit time consuming with the chopping and long cooking time of the beef, the double-rising of the homemade dinner rolls, and the chilling of the dessert. However, it’s completely worth it. Doubt me? I made the entree twice in a three week period. I had very happy friends.
Buttermilk Dinner Rolls (below!) & Herb Butter
Chocolate Mousse
Chianti
The buttermilk dinner rolls were easy to make and were fabulous served warm with a warm winter soup or stew. Next time, I might try adding a little fresh herbs directly to the dough for an additional burst of flavor.
Adapted from Williams Sonoma Cooking At Home p. 415
Makes 12-18 dinner rolls
